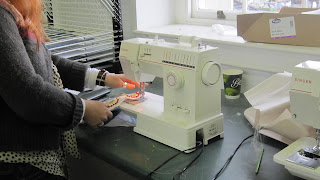
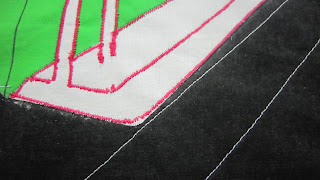
There is a variety of ways of stitching/sewing fabric, all of which can be used in isolation or in conjunction to create a variety of effects.
Sewing Machine
1. Raise the needle to its highest position by turning the hand wheel toward you.
2. Raise the presser foot. This will allow the thread to easily pass through the threading points and will prevent the machine needle from becoming unthreaded when you begin to stitch.
3. Place a spool of thread on the spool pin located at the top of your sewing machine. If the spool pin runs horizontally, secure the spool of thread with the cap provided.
4. Take hold of the thread end and pass it through the designated threading points on the top of the machine casing, then down toward the tension assembly. The tension assembly is located on the left side of the machine and controls the flow of thread.
5. Take the thread under the tension assembly and back up through the next threading point at the top left of the machine. Make sure the thread has passed between two tension discs as well as the hook that may be attached to the left side of the tension dial.
6. Push the thread end through the lever at the top left of the machine, if applicable, and down through the threading points at bottom left and above the needle.
7. Thread the needle from the front or back of the needle. The threading direction will depend on your machine type.
8. Pull a few inches of thread through the eye of the needle and pull the thread to your left.
9. Insert a wound bobbin into the machine, if necessary, and close the throat plate. A few inches of bobbin thread should be pulled out to the right and sticking out from under the closed throat plate.
10. Take hold of the thread that has been threaded through the machine needle.
11. Rotate the hand wheel toward you until the needle disappears into the bobbin case.
12. Keep holding on to the thread and move the hand wheel so the needle is once again at its highest position. As the needle rises, a loop of bobbin thread will come up as well.
13. Pull the thread out toward your left to draw the bobbin thread loop further out of the bobbin case.
14. Let the top thread go and pull the bobbin thread up until the end comes up. Pull the top and bottom threads under the presser foot and to the back and right of the machine.
For more general information on how to use a sewing machine go to:
http://www.ehow.com/how_5839_thread-sewing-machine.html
Some examples of stitching effects achieved using a sewing machine.
Hand Stitching
Hand Stitching Techniques |
Straight Stitches |
Running Stitch - Take several running stitches onto the needle before pulling it through fabric. Secure end of stitching with a backstitch (opposite). Short, even stitches of 1/4" (6 mm) give close control. Uneven basting, which combines a long stitch of 1/2" (1.3 cm) and a short stitch, can be used for straight or slightly curved seams. | |
|
|
Backstitch - Bring needle and thread through fabric to upper side. Insert needle 1/16" to 1/8" (1.5 to 3 mm) behind the point where thread came out. Bring needle forward and out the same distance in front of that point. Continue inserting and bringing up needle half a stitch length behind and in front of previous stitch. Stitches on underside will be twice as long as those on upper side. | |
Prickstitch - Bring needle and thread through fabric to upper side. Insert needle through the fabric, one or two fabric threads behind point where thread came out. Bring needle up 1/8" to 1/4" (3 to 6 mm) in front of the point where the thread emerged. The top surface stitches should be very small "pricks". | |
Slipstitch - Work from right to left, holding the folded edge in your left hand. Bring the needle up through the fold. Take a stitch into the garment directly opposite the point where thread came out, catching one or two threads. Slip needle through fold a distance of about 1/4" (6 mm). Continue taking stitches about 1/4" (6 mm) apart
| |
Catchstitch - Work from left to right with needle pointing left. Take a small horizontal stitch in hem edge. Take another small horizontal stitch in garment, about 1/4" (6 mm) to the right of first stitch, crossing the stitches. Alternate stitches in a zigzag pattern. Work the blind catchstitch like the blindstitch, folding hem away from you.
| |
Blindstitch - Work from right to left with needle pointing left. Roll hem edge back about 1/4" (6 mm). Take a very small horizontal stitch in the garment. Take the next stitch in the hem, 1/4" to 1/2" (6 mm to 1.3 cm) to the left of first stitch. Continue alternating stitches. Be careful to keep the stitches in the garment side very small, and do not pull too tightly.
| |
|
Taken from the website:
http://www.sewing.org/html/handstittch.html
Appliqué
Appliqué is a crafting technique in which pieces of material are mounted to another base material. It is often used in quilting to create bright and distinctive designs, and it may also be used to dress up clothing, or make unusual placemats and potholders. Appliqué is a very old art form, and examples of appliqué which are hundreds of years old can be seen in museums all over the world. It is also very easy to learn appliqué, although it can take a long time to become a master of the art.
The word comes from the French appliquer, which means “to apply.” To create appliqué, artists start with a base, which may consist of a solid piece of fabric or many pieces sewn together, as in the case of a quilt. Shapes are cut from other textiles and sewn or glued onto the base; it is also possible to make appliqué with ribbons, cords,sequins, beads, and other materials. Depending on whether the appliquéd design is ornamental or functional, the applied material may be firmly attached or more loosely glued or sewn.
Taken from the website:
Some of the effects achieved using hand stitching and appliqué.
Bond Web
Bond web is a material which essentially acts like a glue and allows you to attach pieces of fabric by ironing it with the web in the middle. It is fairly secure and can create a nice clean effect especially if you do not want any stitching. Below is a great example of the very careful and precise use of this method.


No comments:
Post a Comment